This is an ongoing series of posts where I share my learning progress and resources while developing my first 2D Platformer with UE4 and Paper2D. Feel free to help me out if you know some tips & tricks. If you follow along, I would be happy to see your progress – get connected!
What I am trying to achieve with this small game (prototype):
- Develop a playable 2D Platformer game as a Minimum Viable Product (Extra Credits Video)
- Learn key mechanics and break down features to the smallest function
- Get into Blueprint scripting as a visual C++ representation
- Build components which can be used in future projects
Part 1: Project Start, Tileset and Tilemap Setup
If you don’t have Unreal Engine 4.8+ installed yet, get it! This release gives us a lot of new features and improvements inside the Paper2D plugin. Most important: Tileset and Tilemap Editor with Collisions. Start a new blank project with no starter content.
Also helpful:
- create a base folder first for everything related to your project, not only the UE4 project data
- set up a version control system for the UE4 folder (Git, SVN, Perforce)
- create some sort of ToDo List to capture your ideas and resources (I use Trello)
Get some Game Art to start with
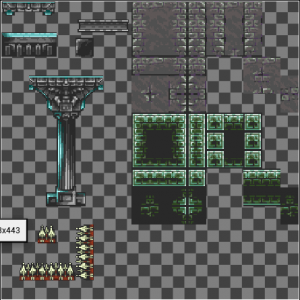 If you are a developer like me and not an artist, Open Game Art is a good resource to get some nice content to start with. Just have a look at some of these tilesets for your own game idea. Remember to follow the licence under wich the authors released their stuff. For me the castle tileset is a good placeholder and might even be used to finish the game. It’s more of a prototype anyway? :)
If you like to know more about creating your own tileset, have a look at this (long) tutorial from Orianart.
Import the 2D Platformer Tileset(s)
So let’s get started:
- import the tileset as a normal texture (drag into or open file dialog)
- right-click on the texture and under Sprite Actions “Apply Paper2D Texture Settings”
- then build it with the Sprite Action “Create Tile Set”

Inside the Tileset Editor you define the tile-size and collisions for this texture. You need to know the size of each tile (e.g. 16x16px, 32x32px etc.).
Select each tile which should get a collision border. In most cases you can use the boxed collider and fill the whole tile. But you can also create individual colliders with the polygon tool. Snap to pixel is helpful, as the editor has a much higher resolution than your pixel art.
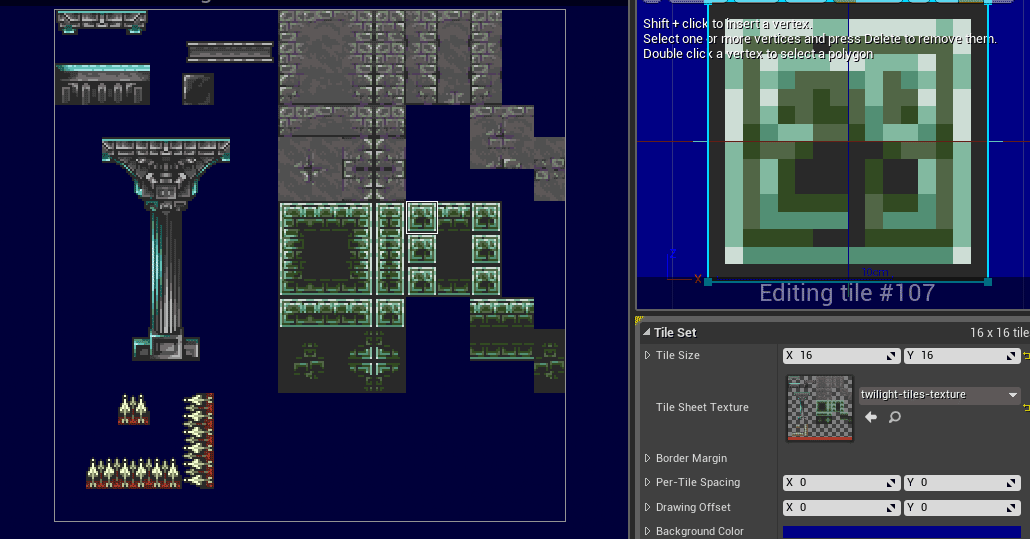
Create all assets for your backgrounds and platforms this way, as we are going to use the tilemap editor in the next step to build our level.
Tilemap – The first test level
With a configured Tileset we can start blocking out our first level *exited*. Create a new Tilemap and start “painting” whatever you like. If you have no ideas yet, don’t worry. Just place some platforms, pits and other placeholders, so a character can run around later on.
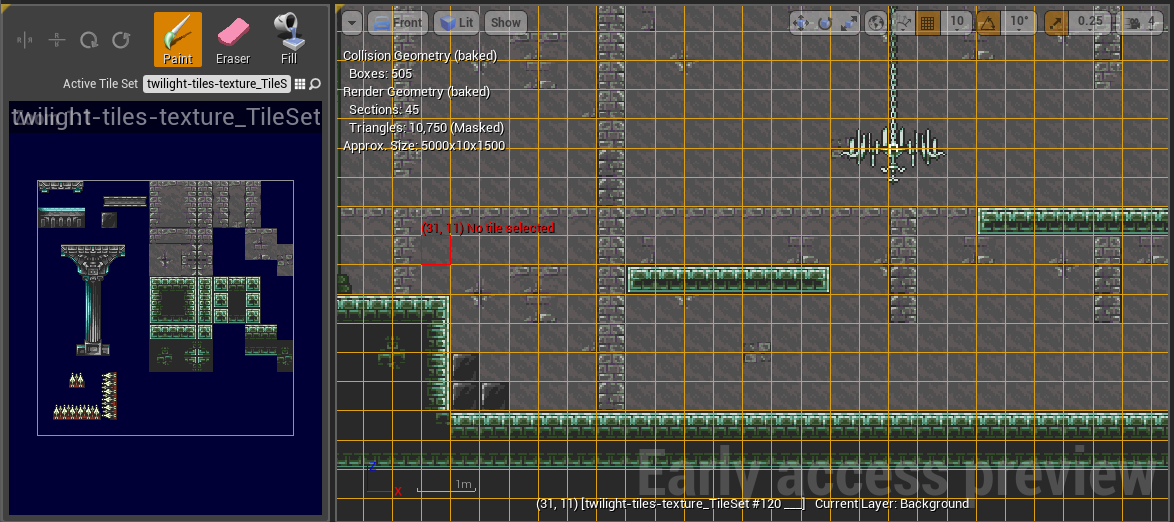
On the left side you choose the tileset you wish to use. On the right side (not shown on this picture) you set up the important parameters for these tiles. As material I just use the unlit masked sprite material from the Paper2D Plugin content, as we are not using a light-setup (yet) and a Pixel per Unit value of 0.32.
On the top-right you have the layer-setup. Use these layers to position your tiles and build background, middle- and foreground (platform) elements. If you paint the background, you can deactivate collisions for this layer completely.
For more infos how to use the Tilemap Editor, watch the following video by DokipenTechTutorials. It helped me a lot to get a quick intro. But keep in mind that is was created for the experimental features of the UE4.7 version, which didn’t include collisions yet.
Conclusion
By now we have a simple test level map to get things started. We can drag it into the viewport and align it towards the front camera. The location should be on the zero Y-axis. I will get back here later, when I am actually designing the levels. Right now I will concentrate on building the game functions into this test setup so that a “level designer” can build upon my components. Well, in the end I will be the level designer anyway – but dreaming is not forbidden, right? ;-)
The next post will be about creating our player character and how to start running around!

2016-03-16
Thank you. This was a massive help in assisting me with my first bit of game development.
Thank you.
2016-03-16
You’re welcome :)
2021-10-25
Great work, i get the UE and start making my first 2d platformer. Thanks bro!